Service Manager
Setting Up User Login
This section contains information about various login configurations.
•Defining the Login Credential Priority
•About Setting the Password Policy
•Viewing a List of Users with External Logins
•Configuring the Session Timeout
•Working with Security History
•Logging In or Accessing Records Using URLs
•Configuring the Save For Later Feature
Defining Account Locking
Use the Security & Session workspace to manage the account locking configuration for the current tenant.
There are two types of locking:
•A soft lock is when you enter an incorrect password a certain number of times. After a certain amount of time, the account unlocks.
•A hard lock is when you are locked out and the only way to fix this is by having an administrator unlock the account.
Follow these steps to configure locking:
1.From the Configuration Console, click Configure > Security Controls > Security & Session to open the Security & Session workspace.
2.Navigate to the Account Locking section.
3.Enter information into the fields. The default settings can be re-set to different values.
| Field | Description |
|---|---|
| Enabled | Enables account locking. Unselect to disable account locking. |
| Soft Lock Attempts | The number of login attempts a user can make before the account is soft locked. Default setting is 5 attempts. |
| Soft Lock Period | The time, in minutes, for the soft lock to be in effect. Default setting is 5 minutes. |
| Hard Lock Attempts | The number of login attempts a user can make before the account is hard locked. Default setting is 20 login attempts before the account is locked. |
| API Key | The API key. The API key is required for soft locking to work correctly. See Working with API Keys. |
Setting the Concurrent Session
Use the Concurrent Session section to define the concurrent session feature for different types of users.
1.From the Configuration Console, click Configure > Security Controls > Security and Session to open the Security and Session workspace.
2.Navigate to the Concurrent Session section.
3.Enter the required information in the fields. By default, the value for each field will be set to 0.
| Field | Description |
|---|---|
| Named User | No limit. Named users can have multiple sessions. |
| Privileged User | Users who have permission to "Run Admin Tool." Limit can be set to no more than three concurrent sessions. |
| Non Privileged User | Limit can be set to no more than two concurrent sessions. |
4.If the concurrent session limit is met, an error message will appear on the screen, "You have reached the maximum concurrent sessions possible. Please logout from other devices and try again."
Defining the Login Credential Priority
Use the Security & Session workspace to define which login credentials to use first when logging in.
1.From the Configuration Console, click Configure > Security Controls > Security and Session to open the Security and Session workspace.
2.Navigate to the Login Priority section.
By default, Try internal login before external is checked, directing Service Manager to use internal login credentials before attempting to use external authentication credentials.
3.To use external login credentials first, disable this option.
About Setting the Password Policy
The application configures all available password fields (such as TenantEmailConfiguration and TenantEmailMailbox to be of password field type. You can only define one password policy for a tenant; therefore, the password policy must accommodate all the various password values configured in the tenant.
Setting the Password Policy
Use the Security and Session workspace to manage the password policy for each tenant.
1.From the Configuration Console, click Configure > Security Controls > Security and Session to open the Security and Session workspace.
2.Navigate to the Password Policy section.
3.Enter information into the fields. The default settings can be re-set to values available in the drop‑down menus.
| Field | Description |
|---|---|
| User Passwords Expire in |
Number of days before the password must be changed. Default setting is Never Expires. Custom number can be typed from 1 to 255 days. To comply with FedRAMP standards, the custom number should be set from 1 to 60 days. |
|
Minimum Password Age in Days |
Number of days that should age for a password before it can be reset by a user. For example, if the value is set to 2, then a user will be unable to reset the password for two days. If the Minimum Password Age in Days value is set to zero, then the password can be reset at any point in time. If a user wants to reset the password before meeting the set value, then the user must contact the administrator. |
| Minimum Password Length | Minimum length for passwords. Default setting is 7 characters. To comply with FedRAMP standards, the password length should be set to 15 characters. |
| Password Complexity |
Specifies the password complexity requirements for application users. Specifications include:
To comply with FedRAMP standards, select Fedramp from the list. |
|
History Depth |
This field keeps a record of the number of times a user can change the password in ISM. By default, this field is set to 3. According to FedRAMP standards, the previous 24 passwords cannot be repeated. Hence, to comply with FedRAMP standards, set the value to 24. |
| Allow Forgot Password Request | Adds a link to the application login page where users can request a new password. |
| Forgot Password Email Subject | The contents of the subject line of the Forgot Password email. |
| Forgot Password Letter Template |
The text of the Forgot Password email. Include the ($TempInternalAuthPassword) string used to generate a temporary password. The temporary password expires within 3 days of the password request. |
4.Click Save Policy.
After updating the policy, the application sends an error message if a user tries to change a password to one that does not meet the updated password policy. The policy is enforced on password changes, not for previously existing passwords.
Changing User Passwords
When a user changes a password in the application, Service Manager checks the password against current password policy requirements. If the new password does not meet the requirements, an error message appears.
Users can change their password from any of the following places:
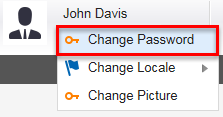
•From the login ID menu in the Service Manager Application.
Login ID Menu
•From the Employee workspace. See Working with Employees.
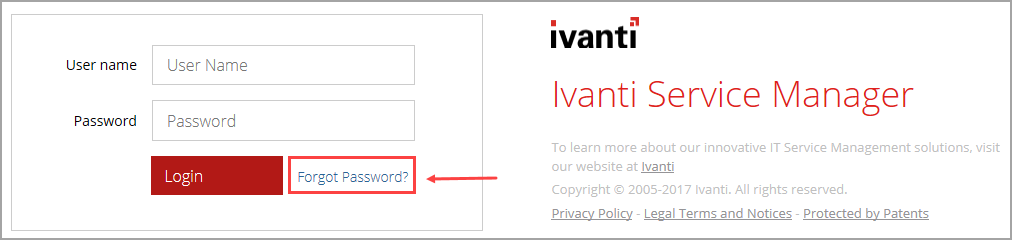
•From the Forgot password link on the Login page.
Login Page
Viewing a List of Users with External Logins
The External Login workspace lists users that have logged into the application externally.
1.From the Configuration Console, click Configure > Security Controls > External Logins to open the External Login workspace.
The list of external users currently logged in are listed.
Using the Identity Store
The Identity Store workspace lists all the users who have login access to Service Manager . These users have login IDs and passwords.
•Viewing the Identity Store List
Viewing the Identity Store List
1.Log into the Service Manager Application.
2.Open the Identity Store workspace. A list of identities appears.
3.Double-click a record from the list to see details.
Showing Identity Details
1.Log into the Service Manager Application.
2.Open the Identity Store workspace. A list of identities appears.
3.Select a user name from the list. The user details appear in the bottom panel of the window.
4.For more information, select a user from the list, then click Show Identity Details from the toolbar. The Employee workspace opens and the user details appear on the page. See Working with Employees. Edit employee details within the Employee or External Contact workspace.
Exporting an Employee List
1.Log into the Service Manager Application.
2.Open the Identity Store workspace. A list of identities appears.
3.Click Export Employee List from the toolbar. The export confirmation window appears.
4.Click Yes. A second confirmation window appears.
5.Click Yes. Depending on how many records you have, the export might take several minutes, tying up your computer and possibly the database.
The Open Export window appears.
6.To open the export file in Microsoft Excel, select Open.
7.To save the file to your local computer, select Save File. The file is saved to your downloads folder.
8.Click OK.
Configuring the Session Timeout
•About the Session Timeout Interval
•Changing the Timeout Interval
About the Session Timeout Interval
You can define the time (in minutes) that the current login session can remain inactive before the application automatically times out. The specified timeout is effective the moment a user logs in.
You can change the timeout interval for your tenant. The default setting is 120 minutes. We recommend setting this to a value between 45 and 120 minutes, depending on how your users access the application. The application uses one timeout setting for both internal and external users.
When the application reaches the specified timeout interval, the application displays a message giving users the option to log in again to the current page by entering their login password. This allows user to continue working without losing any unsaved changes.
Changing the Timeout Interval
1.From the Configuration Console, click Configure > Security Controls > Security and Session to open the Security and Session workspace.
2.Navigate to the Session Timeout section.
3.Click the Timeout (Minutes) value.
4.Enter a new interval time in minutes.
5.Click Save.
The new timeout value is effective the next time you log in.
To bypass this feature, you can implement SAML 2.0 for single sign-on and pass-through authorization. This eliminates the need for a login page and allows users to directly pass through into the application. Contact Ivanti Support for more information on how to do this.
Working with Security History
You can get a list of when users log in from the Security History workspace.
Prior to Service Manager Release 2015.2, this workspace was called the Logon History workspace.
1.While logged in as administrator, do one of the following:
•From the Service Manager Application, open the Security History workspace.
•From the Configuration Console, click Monitor > Security History to open the Security History workspace.
The list of logins appears with the following information:
| Column | Description |
|---|---|
| Event Date | The date of the event |
| Event Type | The type of event |
| User | The user name |
| Message | Message details of the event |
| Logged from IP | The IP address of the user |
| Login date/time | The date and time the user logged in |
| Login Type | The login type, such as new login |
| Logout date/time | The date and time the user logged out |
| Logout Type | The type of logout, such as explicit |
| Role | The role the user logged in as |
| Authentication Type | The authentication type used |
| Last Request | The date and time of the last login request |
| Successful Login | Success of the login: successful or unsuccessful attempt |
| User Agent | The browser and operating application that the user was using |
Allowing Framing
In the context of a web browser, a frame is a part of a web page or browser window that displays content independent of its container, with the ability to load content independently. The HTML or media elements that go in a frame may or may not come from the same web site as the other elements of content on display.
By default, Service Manager allows framing. Use caution when allowing framing across domains, as this could lead to security problems.
1.From the Configuration Console, click Configure > Security Controls > Security and Session to open the Security and Session workspace.
2.Navigate to the Framing section.
3.Check Allow framing to allow framing, or uncheck it to disable framing.
Canceling User Sessions
You can simultaneously terminate multiple user sessions.
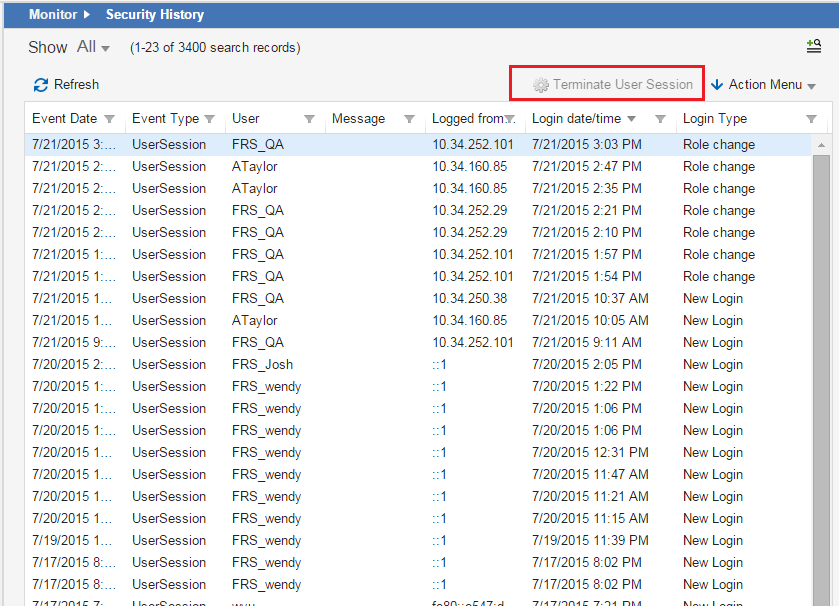
1.From the Configuration Console, click Monitor > Security History to open the Security History workspace.
2.Select the user sessions to cancel.
3.Click Terminate User Session. The application disables this button if any of the selected user sessions are already terminated. A confirmation window appears.
Terminate User Session
4.Click Yes.
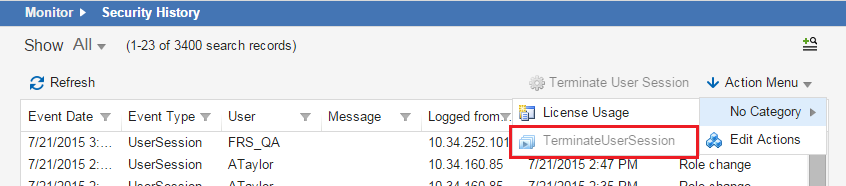
You can also cancel sessions from the Action Menu.
Terminate User Session Quick Action
About Logging Out
When a user closes the last browser tab or window in Mozilla Firefox, the active session is stopped. This enables other users to access the application without compromising licensing limitations. This is not possible for Microsoft Internet Explorer or Google Chrome, at this time.
The active session is removed when the user closes the browser window in Microsoft Internet Explorer and Mozilla Firefox, freeing the license for other users. Google Chrome does not log out users when they close the window, but rather keeps the sessions open, allowing users to resume their session at a later time.
Was this article useful?
Copyright © 2019, Ivanti. All rights reserved.